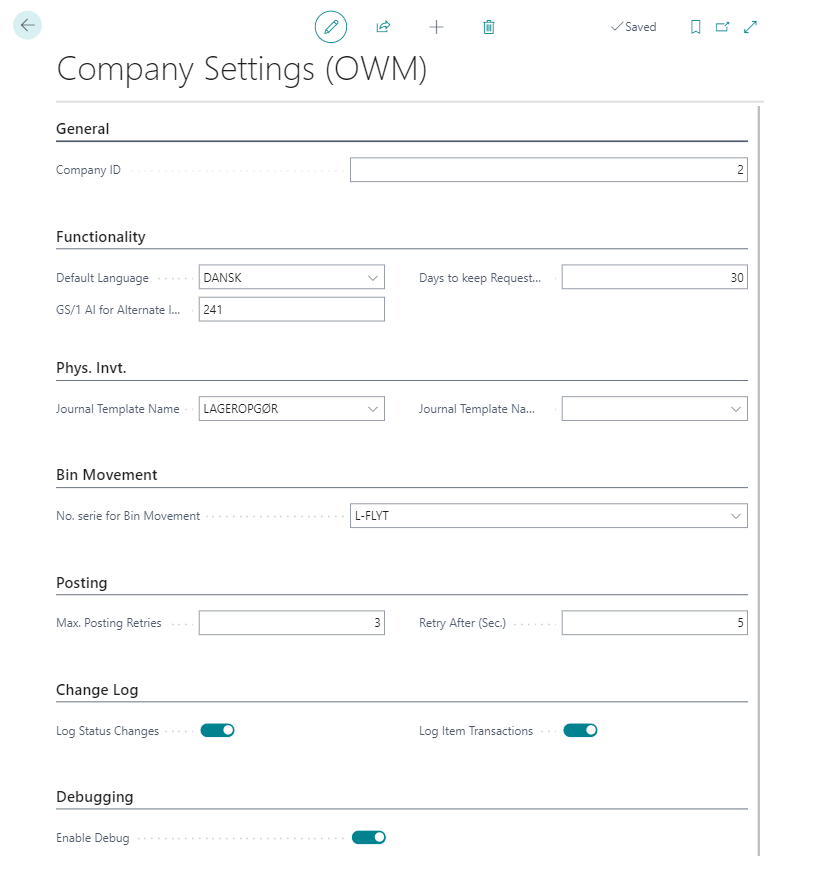
Company settings
To properly connect Online Warehouse Management with your Business Central, there are a few items that must be put in order.

- Navigate to the Company settings view either through the Online Warehouse Management overview or by searching for Company settings (OWM)
- Select the appropriate Company ID.
- Fill in the fields under Functionality.
- Default Language. Currently available are Danish and English.
- Days to keep Request Jobs. The number of days Online Warehouse Management activities are kept before being moved to archives. This is usually set to 30 days.
- GS/1 code for Alternate Item No.. The GS1 code that is used with items that have SSCC's when added to the warehouse.
- Fill in the fields under Phys. Invt.. You should have previously set up inventory, and should thus select the appropriate values for the fields in question.
- Select a number series for Bin Movement. Online Warehouse Management puts a bin number on each move, thus a number must be selected.
- Fill in fields under Posting.
- Max posting retries. The number of times you can reattempt posting a scanning, after which the item will be removed from the scanner and the error will have to be tended to manually in Business Central.
- Retry after (Sec.). The amount of seconds the system will wait before reattempting to post after failing. This is by default 5.
- Select options under Change Log. It is recommended that you do not keep these on at times where you do not actively need them, as logging the data unnecessarily can cause the system to slow down over time.
- Log Status Changes. Logs the changes to the status of individual items.
- Log Item Transactions. Logs which items have been scanned.
- Select whether you want Debugging turned on. This logs the XML exchange between the handheld scanners and Business Central. This is also not recommended to have turned on unnecessarily.
Once you have finished these, you can continue to location settings.
